Installation
TaskView runs as a set of Docker containers - a database, an API server, a web app, and a one-time migration runner. The whole setup takes about 5 minutes.
Prerequisites
- A server or local machine with Docker and Docker Compose installed
- Ports
8888(web) and1725(API) available - you can change these in the compose file
Step 1: Create a project directory
mkdir taskview && cd taskview
Step 2: Create environment files
You need two env files - one for PostgreSQL, one for the TaskView API.
.env.postgresql - database credentials:
POSTGRES_USER=taskview_db_user
POSTGRES_PASSWORD=your_secure_password
POSTGRES_DB=taskviewdb
.env.taskview - application config (example, do not forget add your data):
DB_HOST="db"
DB_USER="taskview_db_user"
DB_PASSWORD="your_secure_password"
DB_NAME="taskviewdb"
DB_PORT=5432
# Postgres connections per API worker (this is the default)
DB_POOL_MAX=20
APP_PORT=1401
# API worker processes (this is the default). Accepts a number or "max" (one worker per CPU core).
# Keep PM2_INSTANCES x DB_POOL_MAX below the Postgres max_connections limit (default 100).
PM2_INSTANCES=2
JWT_ALG="HS256"
JWT_SIGN="secret"
ACCESS_LIFE_TIME="3d"
REFRESH_LIFE_TIME="9d"

SMTP_HOST=smtp
SMTP_PORT=587
SMTP_USERNAME=
SMTP_PASSWORD=
SMTP_ENCRYPTION=tls
SMTP_FROM_NAME=TaskView
SMTP_FROM_EMAIL=

# Your domain
APP_URL="https://app.taskview.tech"

GOOGLE_CLIENT_ID=""
GOOGLE_CLIENT_SECRET=""
#You domain
GOOGLE_CALLBACK_URL="https://api.taskview.tech/module/auth/provider/google/callback"
GITHUB_CLIENT_ID=""
GITHUB_CLIENT_SECRET=""
GITHUB_CALLBACK_URL="https://api.taskview.tech/module/auth/provider/github/callback"
APPLE_CLIENT_ID=""
APPLE_TEAM_ID=""
APPLE_KEY_ID=""
APPLE_KEY_LOCATION="/usr/src/app/AuthKey.p8"
# Your domain
APPLE_CALLBACK_URL="https://api.taskview.tech/module/auth/provider/apple/callback"

#integrations
GITHUB_INTEGRATION_CLIENT_ID=
GITHUB_INTEGRATION_CLIENT_SECRET=
GITHUB_INTEGRATION_CALLBACK_URL=https://api.taskview.tech/module/integrations/oauth/github/callback

GITLAB_INTEGRATION_CLIENT_ID=
GITLAB_INTEGRATION_CLIENT_SECRET=
GITLAB_INTEGRATION_CALLBACK_URL=https://api.taskview.tech/module/integrations/oauth/github/callback

ENCRYPTION_KEY=

#!!! ADD YOUR DOMAIN SEPARATED BY ","
CORS_ALLOWED_ORIGINS="http://localhost:5173,http://127.0.0.1:5173,http://localhost:3000,http://localhost:8888,http://127.0.0.1:3000,http://127.0.0.1:8888"
your_secure_password and JWT_SIGN with real secrets. Never use the example values in production.Step 3: Create docker-compose.yml
networks:
  backend:
services:
  db:
    image: postgres:17
    restart: unless-stopped
    env_file:
      - ./.env.postgresql
    volumes:
      - pgdata:/var/lib/postgresql/data
    ports:
      - "5433:5432"
    healthcheck:
      test: ["CMD-SHELL", "pg_isready -U taskview_db_user -d taskviewdb"]
      interval: 5s
      timeout: 5s
      retries: 5
    networks: [backend]
  migration:
    image: gimanhead/taskview-ce-db-migration:latest
    restart: "no"
    depends_on:
      db:
        condition: service_healthy
    env_file:
      - ./.env.taskview
    networks: [backend]

  taskview-api-server:
    image: gimanhead/taskview-ce-api-server:latest
    restart: "unless-stopped"
    sysctls:
      - net.ipv6.conf.all.disable_ipv6=1
      - net.ipv6.conf.default.disable_ipv6=1
    ports:
      - "1725:1401"
    depends_on:
      db:
        condition: service_healthy
      migration:
        condition: service_completed_successfully
    env_file:
      - ./.env.taskview
    volumes:
      - ./logs:/usr/src/app/logs
      #- /local/AuthKey.p8:/usr/src/app/AuthKey.p8
    networks: [backend]

  taskview-webapp:
    image: gimanhead/taskview-ce-webapp:latest
    restart: unless-stopped
    environment:
      # The web app will always use this API server and hide the server selector on the login page.
      # Remove this variable if you want to pick the API server manually on the login page.
      TASKVIEW_API_URL: "http://localhost:1725"
    ports:
      - "8888:80"
  # Enable for realtime notification read https://taskview.tech/docs/configuration/environment-variables#centrifugo-configuration-file
  # centrifugo:
  #   image: centrifugo/centrifugo:v6
  #   restart: unless-stopped
  #   command: centrifugo -c config.json
  #   ports:
  #     - "8000:8000"
  #   volumes:
  #     - /path-to/centrifugo/config.json:/centrifugo/config.json
  #   networks: [backend]
volumes:
  pgdata:
Step 4: Start everything
docker compose up -d
Docker will pull the images, start the database, run migrations, and launch the API and web app.
Step 5: Open TaskView
Go to http://localhost:8888 in your browser. You'll see the login screen.
Configure the API server
The web app (port 8888) serves the frontend, while the API server (port 1725) handles authentication, projects, tasks, and all backend operations.
If you set TASKVIEW_API_URL on the taskview-webapp service (as in the compose file above), there is nothing to configure — the web app already knows where the API is, and the server selector is hidden from the login page.
Without TASKVIEW_API_URL, click the server settings section on the login page and add the API server URL manually:
http://localhost:1725
Log in with the default user
The database migration creates a default user so you can log in right away:
- Login:
user - Password:
user1!#Q
Use these credentials to verify that everything is working - check that the UI loads, you can create a project, add tasks, etc.
Claim the default account
Make the default account your own — no SMTP or database access needed:
- Log in with the default credentials
- Open Account settings — the highlighted Login and email card is shown at the top (it is visible only to the default user)
- Set your own login, email and a strong password, confirm with the current password (
user1!#Q), and click Save and sign out - Sign in again with your new login and password
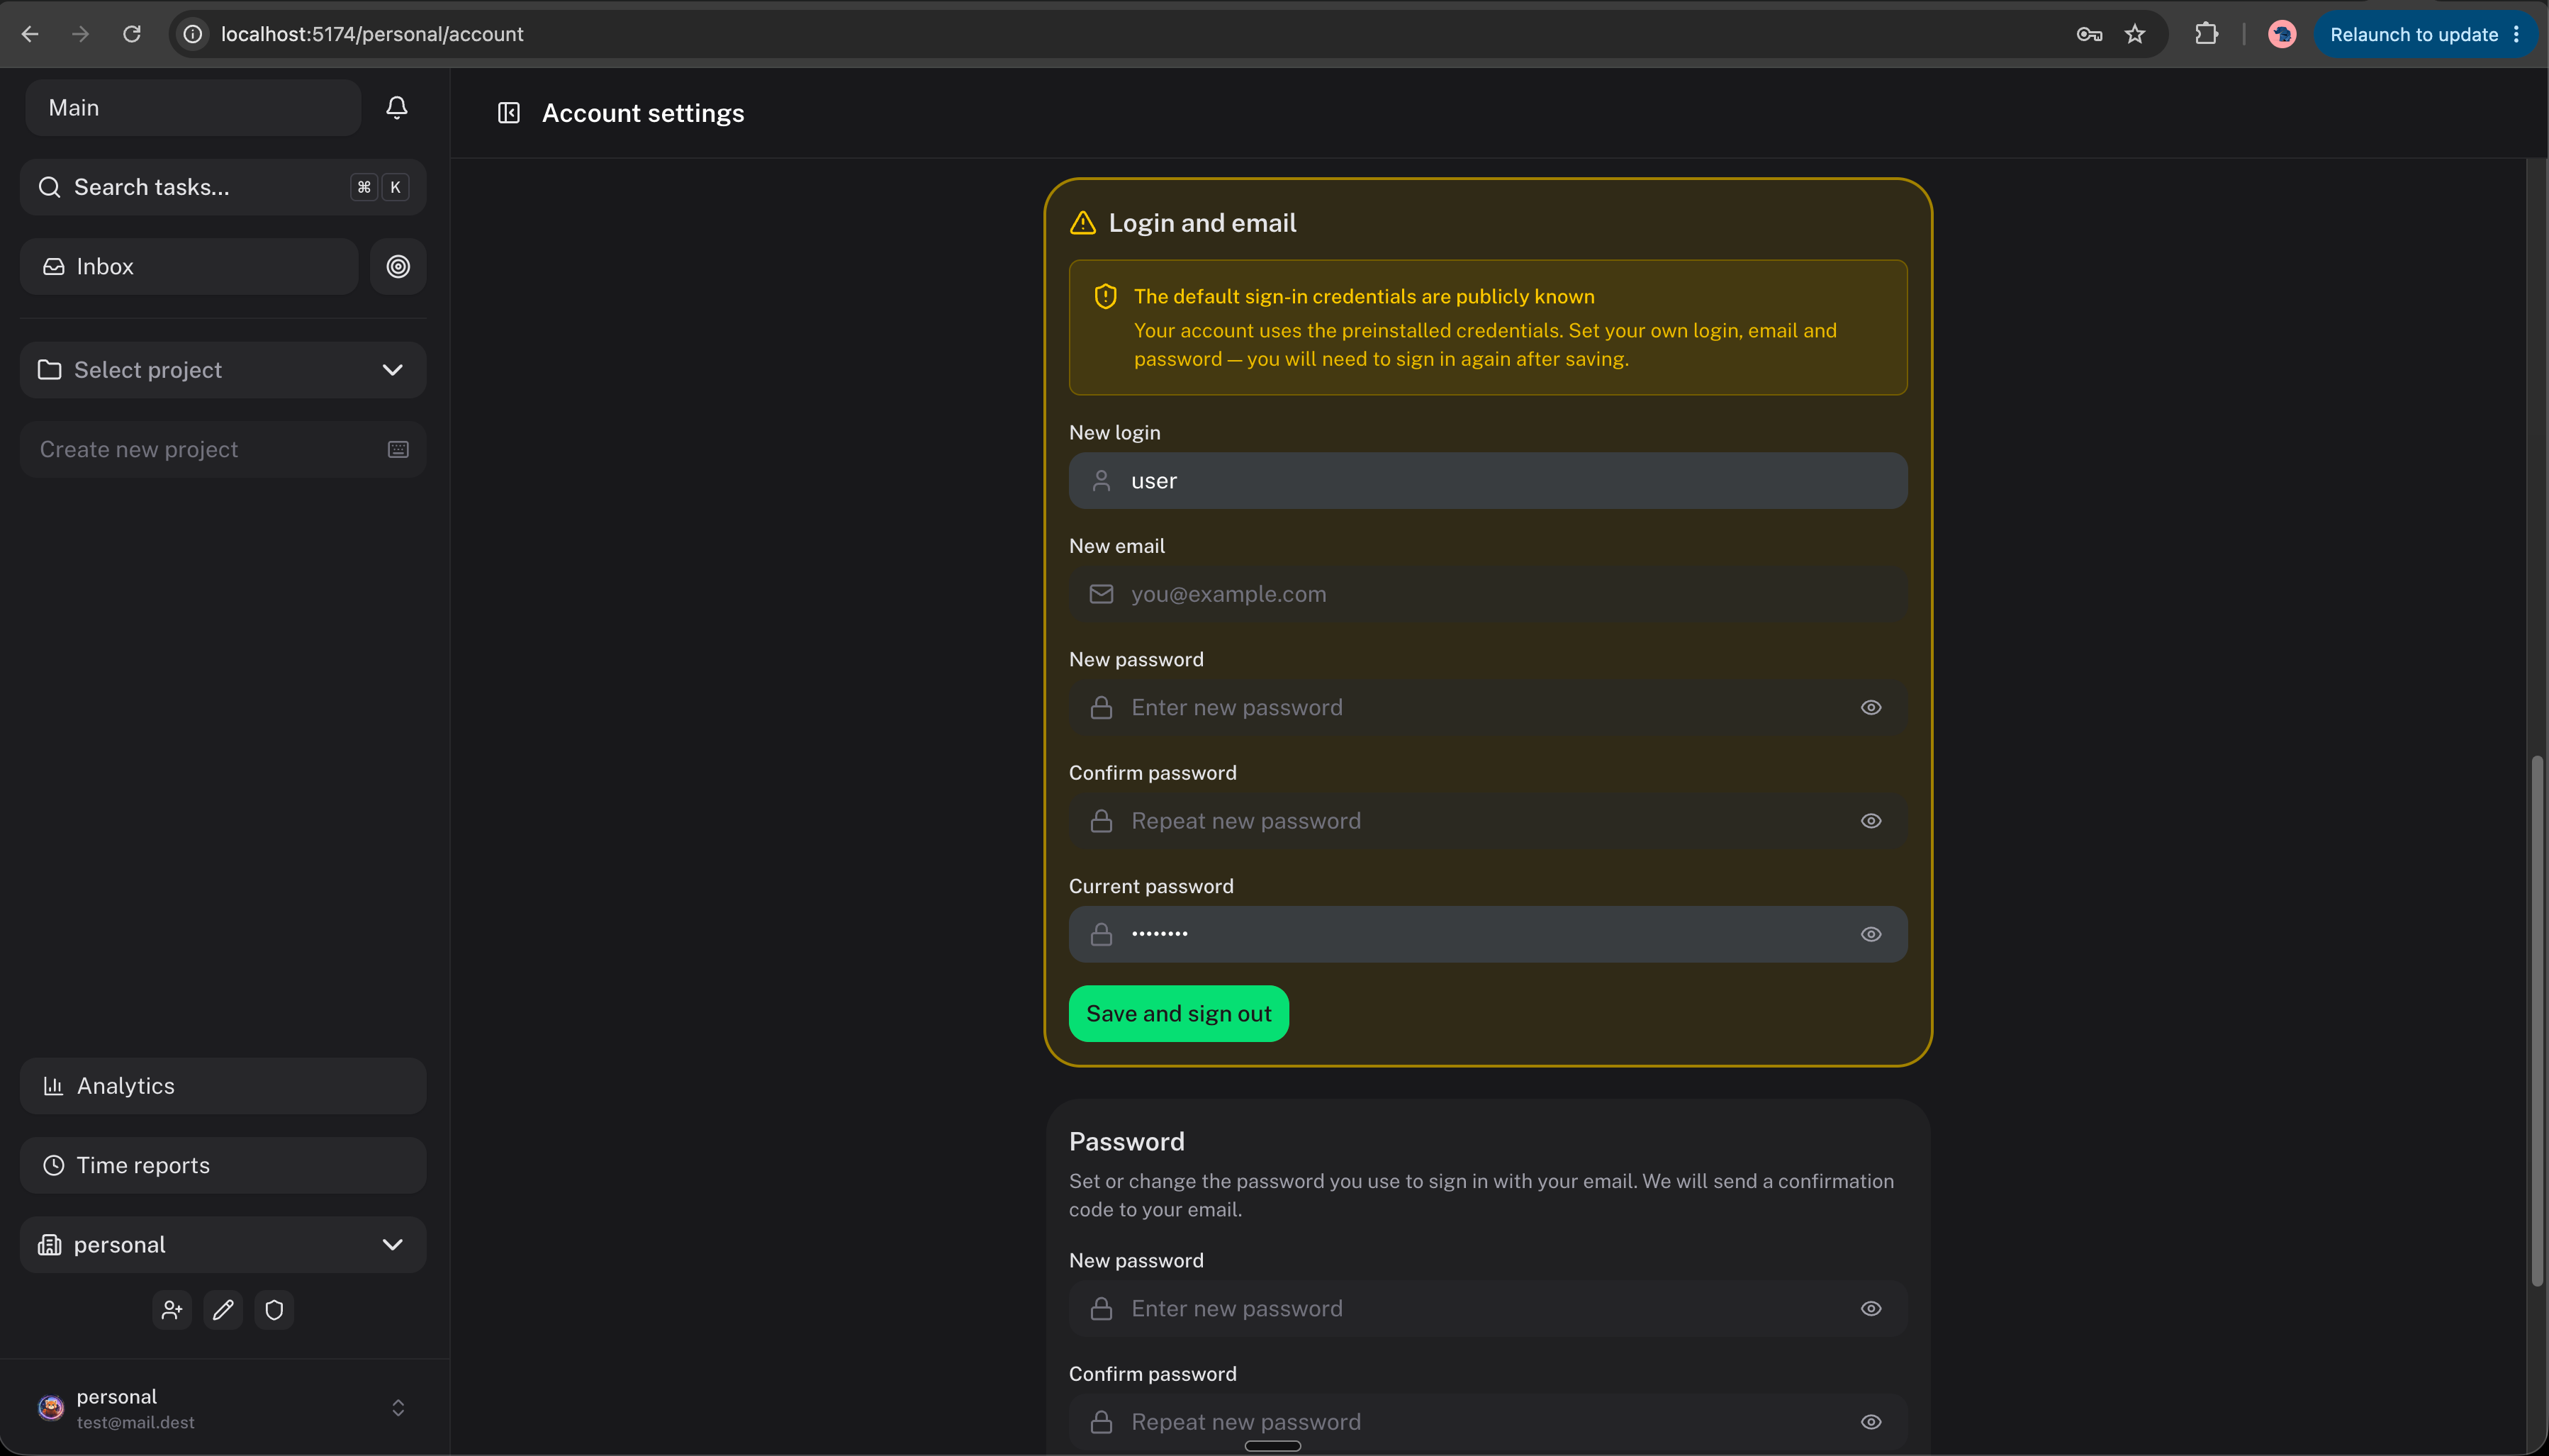
Your organizations, projects and permissions are preserved. Once the email is changed, the card disappears and the claim endpoint is disabled.
PASSWORD_CHANGE_CONFIRMATION="password" in .env.taskview so password changes are confirmed with the current password instead. See Environment Variables.Updating
To update TaskView to a new version:
docker compose pull
docker compose up -d
The migration container will automatically apply any new database changes on startup.
Production tips
- Use a reverse proxy (Nginx, Caddy, Traefik) to terminate SSL and serve everything over HTTPS
- Update
APP_URLin.env.taskviewandTASKVIEW_API_URLon the webapp service to match your production domains - Trim the login page — set
AUTH_LOGIN_METHODSin.env.taskviewto offer only the sign-in methods you actually use (e.g.AUTH_LOGIN_METHODS="password"). Google/GitHub/Apple buttons are shown only when the provider is configured. - Scale API workers deliberately — the API runs
PM2_INSTANCESworker processes (default2), and each worker opens its own pool of up toDB_POOL_MAXPostgres connections (default20). Before raising either value (or usingPM2_INSTANCES=max), make sureworkers × DB_POOL_MAXstays below your Postgresmax_connections(default100) — otherwise the API fails with "sorry, too many clients already". The API logs a warning on startup when the budget looks too high. - Back up the database - the
pgdatavolume contains all your data - Set
restart: unless-stoppedon all services so they survive server reboots - SMTP setup - add SMTP variables to
.env.taskviewif you want email features (password recovery, invitations). See Configuration for details.
What's next
- Create your first project - set up a project with lists and tasks
- Invite your team - add members and assign roles
- Connect GitHub or GitLab - sync issues as tasks
What is TaskView
TaskView is an open-source, self-hosted project and task management platform. Features Kanban boards, dependency graphs, team collaboration, RBAC, GitHub/GitLab sync, and full data ownership. Free alternative to other PM for teams who need privacy and control.
Quick Start
Get started with TaskView in 5 minutes - create projects, add task lists, organize work with Kanban boards and dependency graphs. Quick start guide for self-hosted project and task management.